Pairing Wines

Image


Choosing the right wine to pair with your meal is the key to enhancing your overall dining experience and at Bocca Di Bacco we take pride in our wines! The goal is for your food to compliment and enhance your enjoyment of the wine, and vice versa. So, I'm here to help you choose the right wine for the right taste!

Let’s start with the cheeses. White Zinfandel goes well with bleu and fresher cheeses, while a Riesling goes well with many types, especially buttery or hard cheeses. As far as main courses go, the rule of thumb is usually: white wines go with white meats and red wines pair well with red meats. More specifically, lightly prepared poultry goes well with Chardonnay or Chablis, while poultry with heavier sauces can pair with a light, fruity red. Seafood varies, but most whites will do.

Now for my favorite, dessert! The darker the dish, the darker you should go with your wine. A nice sweet port is always suggested, unless you are feeling for a bit of sweet dessert brandy! Hopefully these tips were helpful and improve the flavors of your dish!

Parmesan Rinds

Image I love using parmesan cheese, it goes into so many of our dishes here at Bocca di Bacco! If you use it too, it can be difficult to figure out what to do with the rind. But before you throw it out with that bottle of wine, learn some new tips and tricks to put that rind to good use!

One great way is to throw it into a pot of tomato sauce while it’s simmering. Some of the salty, creamy taste with seep into the sauce, giving it a deeper flavor. Just take out the rind and discard when you think it is just right! Another tasty idea is to make Parmesan-infused olive oil. Place the rind in a jar and pour in olive oil and some garlic if you have some (I always do!) and let sit for at least a day or two. This unique oil can be used in a number of recipes and is delicious for dipping with some hearty Italian bread! Also, it’s great to pop into soups and stews as they simmer, much like with the tomato sauce. Again, toss out the rind once it is flavorful enough. Lastly, if the rind is pure cheese with no waxed coating, it is perfectly okay to eat! With some elbow grease you can grate it further or you can even grill it until soft and put on some crusty bread for a great snack!

Gorgonzola

Image


Gorgonzola is definitely one of my favorite cheeses! It is an Italian blue veined cheese that is buttery and crumbly. For those that aren't big fans of blue cheese, you may strain away from Gorgonzola, but don't!! Because of the veins, it just has the slightest hint of an aged flavor, but not overwhelming like a true blue cheese.

I personally LOVE it in my Penne Gorgonzola with Peas! The sauce itself is a cream sauce, blended with a few dabs of Gorgonzola, giving it a nice smoky, salty, deep flavor. Adding the peas really freshens up the dish and gives it that light balance. A little crunch from the walnuts breaks through the overall creaminess of the dish, and gives that nice nutty flavor that pairs so well with the cheese.

Image

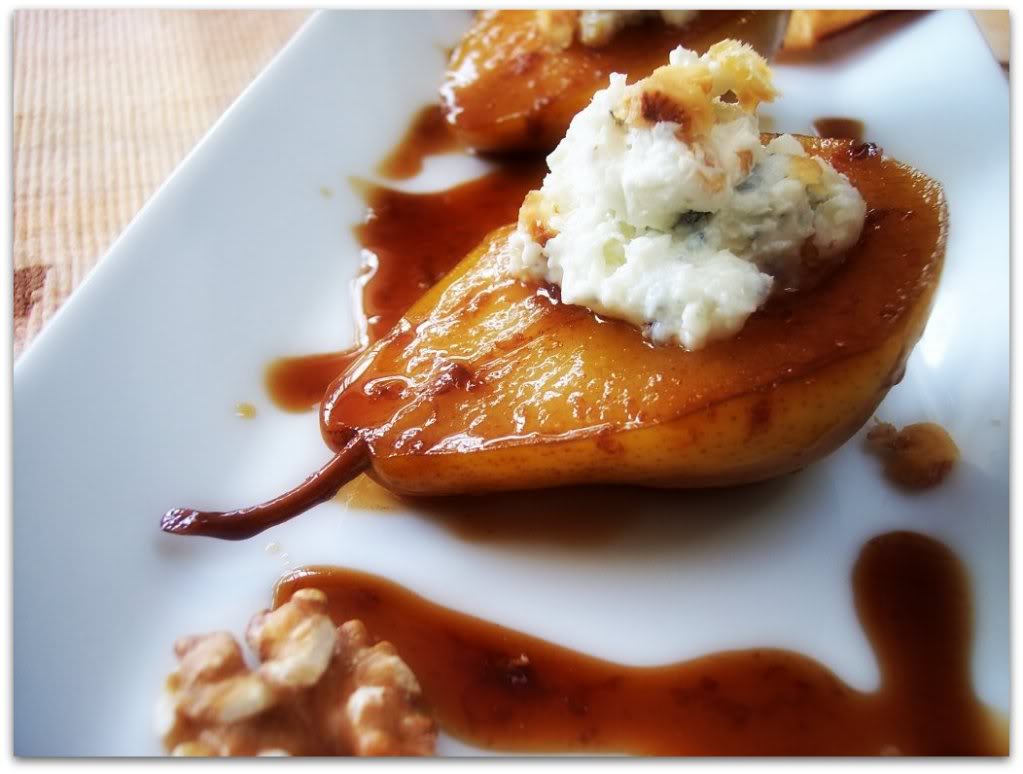
But there are TONS of ways to use Gorgonzola! It is wonderful with pears and figs, and of course crumbled on top of a fresh summer salad. You'll see it a lot on salads with fruit like grapes, or apples. It just pairs so lovely with the bursts of sweet from the fruit. I've even seen it spread across a nice crostini and drizzled with a bit of honey! Perfect as a personal snack or as an appetizer!

-Chef K

Prosciutto & Melon!

It's time to start enjoying summer and celebrating the fresh and light tastes of the season! Whether pool-side, having a barbecue, or packing a little picnic for the beach, nothing packs more summer punch than having Melon and Prosciutto. Definitely one of my favorite snacks, this salty-sweet treat is super simple and can be used to impress or to be totally casual. To jazz it up for a fancier presentation you can plate it as we do in the restaurant, having the thin melon pieces in the center, and laying out the proscuitto around, giving it a nice, elegant look. To me it looks like a beautiful flower!! Doesn't it? So pretty!

Image

You can also make melon balls, using a melon ball scoop, and actually wrap the proscuitto around each ball, making it perfect as an appetizer bite.

Image

Whichever way you choose to serve it, the flavors together are so wonderful! A burst of juicy sweet melon, and the salty melt in your mouth proscuitto is perfect just as is! I can also suggest adding another level of flavor by drizzling some reduced balsamic over the top. YUM!

-Chef K

Arancini!

2013_0107DBD_Chelsea-155

Sometimes I can't help craving a satisfying snack!  Something small, something bit-size, but that will fill me right up on the go. I happen to LOVE Arancini balls! Growing up Italian, this was definitely a staple! A lot of the ingredients are easy to find ingredients that are usually already in your pantry, making it an easy go-to snack.

The best part is that they are super versatile! I happen to like adding "surprises" within. There's nothing like biting into an arancini and finding melty cheese and little bursts of sweet peas. You can also add chicken, herbs, or whatever you like! Make them smaller for appetizers and party platters, or make them larger for more of a side dish. The options are endless, but no matter how you like to make your arancini balls, they will always taste perfect ;)

Ingredients

3 Cups Chicken Stock

1 Pinch Saffron

1 Shallot, chopped

2 Cup White Wine

1 1/2 Cups Carnaroli Rice (Arborio rice will also work)

2 Eggs

1 Cup Grated Parmesan Cheese

1 Cup cooked peas

1/2 Pound Mozzarella Cheese (Cut into 1/2″ chunks)

4 Cups All Purpose Flour

6 Eggs

4 Cups Bread Crumbs

Directions

1.In a medium pot, lightly brown the shallot and garlic.

2.  Add the rice and keep stirring to allow the rice to get a little crispy. YUM

3. Add the water, wine and saffron. Let cook for 30 minutes, stirring frequently. The rice should be al

dente.

4. Pour rice onto a baking sheet and place in the refrigerator for 15 minutes, or until

cool.

5. Once cooled, transfer rice to a large mixing bowl. Form a ‘well’ in the center of the

rice and add the 6 eggs and parmesan cheese.

6. Mix with hands until everything is evenly mixed together.

7. Scoop out a handful and create a flat surface. Add a pinch of peas, and one chunk

mozzarella to the center, then fold over the edges and roll together to form a ball.

8. Once the balls are formed, in a large mixing bowl of All-Purpose Flour, completely

cover the ball. Then transfer to the flour dipped ball into your egg wash bowl. Lastly roll the ball in a mixing bowl of bread crumbs. **Panko makes them nice and crispy

9. In a large skillet, heat 1/2 cup Extra Virgin Olive Oil. Once heated add rice balls into

the pan and let cook for 3-5 minutes on each side. They should be golden brown.

10. Serve with a light tomato sauce

**For a healthier option, you can also bake the balls in a 350 degree oven until golden brown.

Happy eatings!!!!!

- Chef K

Brown Butter Sage Sauce

2013_0107DBD_Chelsea-219 By far one of our most popular pastas is the Tortelli Ricotta e Spinaci. But did you know that the pièce de résistance - the butter sage sauce - is super easy and quick to make?! This makes it an ideal mid-week quick and delicious fix! Sometimes you may not have as many ingredients to work with, or perhaps you are just in the mood for something besides a marinara based sauce. This quick sauce is perfect to make in a flash, and requires such few ingredients! It's tasty, rich, and a little goes a long way! You can use the butter sage sauce on any kind of pasta you like, but I personally love using it on filled pastas. For example, I use it with a ricotta and spinach filled tortelli pasta, but it is also used a lot with pumpkin or squash filled raviolis too! Talk about winter time favorites!

What you need:
Pasta (of your own choice) 4 tablespoons butter 8 sage leaves 1/2 lemon, juiced 1/4 cup grated Parmigiano-Reggiano
What to do:
As your pasta is cooking, melt the butter in a 12 inch saute pan and cook until a bubbly golden brown.  Add the sage leaves until crisped and remove from the heat. Pour the lemon juice into the butter and then put it aside. Cook your pasta until al dente, and then drizzle the brown butter sauce over the warm pasta. Sprinkle the Parmigiano-Reggiano all over, toss to coat fully and then serve immediately! Easy and delicious!
Let me know how yours comes out and as always, feel free to ask questions! I promise you'll LOVE it!
-Kristin

Storing Herbs in the Kitchen

If there's one thing I use often in Italian cooking, it's herbs! From basil to thyme, rosemary to tarragon, there are so many wonderful herbs to use for cooking. I've noticed that sometimes people shy away from herbs because they can definitely be a little pricier, and of course, can go bad quickly when not used! So, here a few tips! One great way to store herbs is to keep them in a glass jar with some water. Think of them like a new plant! I have found that my basil will last much longer when kept this way. Another great tip I have heard is to wrap them in a damp paper towel and keep it in the fridge. This does work, but definitely not for a long time. This method is best used for immediate use.

My favorite herb tip is actually from our Italian Inspiration board on Pinterest! Freezing your herbs in water or in olive oil is genius! I prefer the olive oil idea though, because that way it's ready to plop into the pot or pan, ready to go!

Sometimes it's the simplest tips that can really make a difference! Be sure to share these tips and try them out at home!

Image

Summer Salads

Image When it’s sunny out, sometimes there’s nothing better than having a crisp, fresh, tasty salad. I’m sure we can all agree that we are all also preparing for our bikini summer bodies too! Whether you’re making them at home, or dining out, some of the best salads don’t have any leaves at all! A huge favorite of mine is our Insalate di Stagione. I take warm, sweet beets and other vegetables like carrots, sprouts, and mushrooms, and cook them ever so slightly to keep them still nice and crisp. The vibrant colors are beautiful too! So now you have this base of gorgeous, fresh, healthy vegetables all packed with flavor just waiting to be dressed up. This is the best part…simple reduced balsamic vinaigrette gets drizzled all over them. It’s thick, sweet, and has that pure, deep balsamic taste that we all love. Next I shred some slices of ricotta salata cheese to top it off. This is a hard ricotta cheese, that is slightly salty and gives the salad that nice bite. To jazz it up even more, I plate it in a Parmesan crust bowl. I know…amazing right?! Altogether it’s just fresh, crisp, warm, sweet, salty, crunchy, and perfect in every bite! Best of all, it is so simple to make. So that’s my summer salad tip for the day! Try making your version at home, or come visit us at Bocca di Bacco! Enjoy!

-Kristin

Spring is Here!

Spring weather is finally here! While the sunny and warm weather is great, I'd have to say the best part of Spring are all the new vegetables and ingredients that are in season! Now that it's warmer out, everyone wants to feel lighter and EAT lighter! So, what am I excited to work with this season? Just to name a few, avocados, beets, summer squash, and artichokes are all perfect for salads, side dishes, or for a healthy pasta meal. For the avocados, I thought a Lobster Cucumber and Avocado salad would be the perfect Spring "pick-me-up" dish. The juicy, sweet lobster, with the crisp refreshing cucumber, and the creamy, luscious avocado just reeks of sun, sand, and vacation.

So! Here's how you do it!

Ingredients you'll need:

  • 1 Avocado

  • ½ Cucumber

  • 1 1lb Lobster

  • 1 Teaspoon Chopped Parsley

  • 1/8 Cup Extra Virgin Olive Oil

  • 1/8 Cup Fresh Lemon Juice

  • 1 Minced Garlic Clove

  • Dash of Freshly Ground Pepper

  • 2 Tablespoon Balsamic Vinegar

  1. Boil Lobster in a large pot for 8 minutes. Remove the Lobster from the boiling water and immediately place it into ice bowl of ice cold water. Remove the Lobster and twist off the tails removing the meat inside. Cut the shell in half and remove the remaining meat. Cut meat into 1\2” chunks, leaving the tails whole.

  2. Thinly slice your cucumber leaving the skin on. Peel and de-pit the avocado and cut into half moon slices.

  3. In a small bowl, whisk together extra virgin olive oil, fresh lemon juice, chopped parsley, minced garlic and ground pepper.

  4. Let the dressing sit for 30 minutes and whisk before serving.

  5. Reduce balsamic vinegar on high heat for 2-3 minutes, until consistency thickens.

  6. Place cucumber slices in circle in the middle of your plate. Add an inner circle of avocado slices and place lobster on top and topping off with the tails on top.

  7. Drizzle lemon vinaigrette on top and around. Finish it off with the balsamic reduction drizzled around the edge of the plate.

Easy enough, right!? And I promise it's tasty too ;) I'll be sharing more warm-weather favorites, so stay tuned! Enjoy the sun!

-Kristin

Image